
How to Use Ivy Cuttings to Expand Your Garden – Propagation Tips: Transforming a single ivy cutting into a flourishing vine is a rewarding gardening journey. This versatile plant, known for its adaptability and ease of propagation, offers a simple and effective way to expand your garden’s beauty.
Whether you’re seeking a lush ground cover, cascading greenery for hanging baskets, or a vibrant vertical display, ivy propagation offers a wealth of possibilities.
From selecting the right cuttings to nurturing their growth, this guide provides a comprehensive overview of the process. We’ll explore different propagation methods, including water and soil propagation, as well as the less common but highly effective air layering technique.
We’ll also delve into the essential care requirements for thriving ivy cuttings, ensuring their successful transition from cuttings to thriving plants.
Introduction to Ivy Propagation
Ivy propagation is a rewarding and cost-effective method for expanding your garden. It allows you to create new plants from existing ones, offering the opportunity to multiply your collection and enjoy the beauty of ivy in various parts of your outdoor space.
Benefits of Propagating Ivy
Propagating ivy through cuttings offers several advantages:
- Cost-Effective:It eliminates the need to purchase new plants, saving you money.
- Preserves Existing Plants:It allows you to create new plants without disturbing the parent plant.
- Genetic Diversity:Propagating ivy from cuttings ensures that the new plants retain the unique characteristics of the parent plant, including its color, leaf shape, and growth habit.
- Fast and Easy:Ivy is relatively easy to propagate, making it a beginner-friendly method for plant enthusiasts.
Types of Ivy Suitable for Propagation, How to Use Ivy Cuttings to Expand Your Garden – Propagation Tips
Ivy is a diverse genus with various species, each possessing unique characteristics. Here are some popular types commonly propagated:
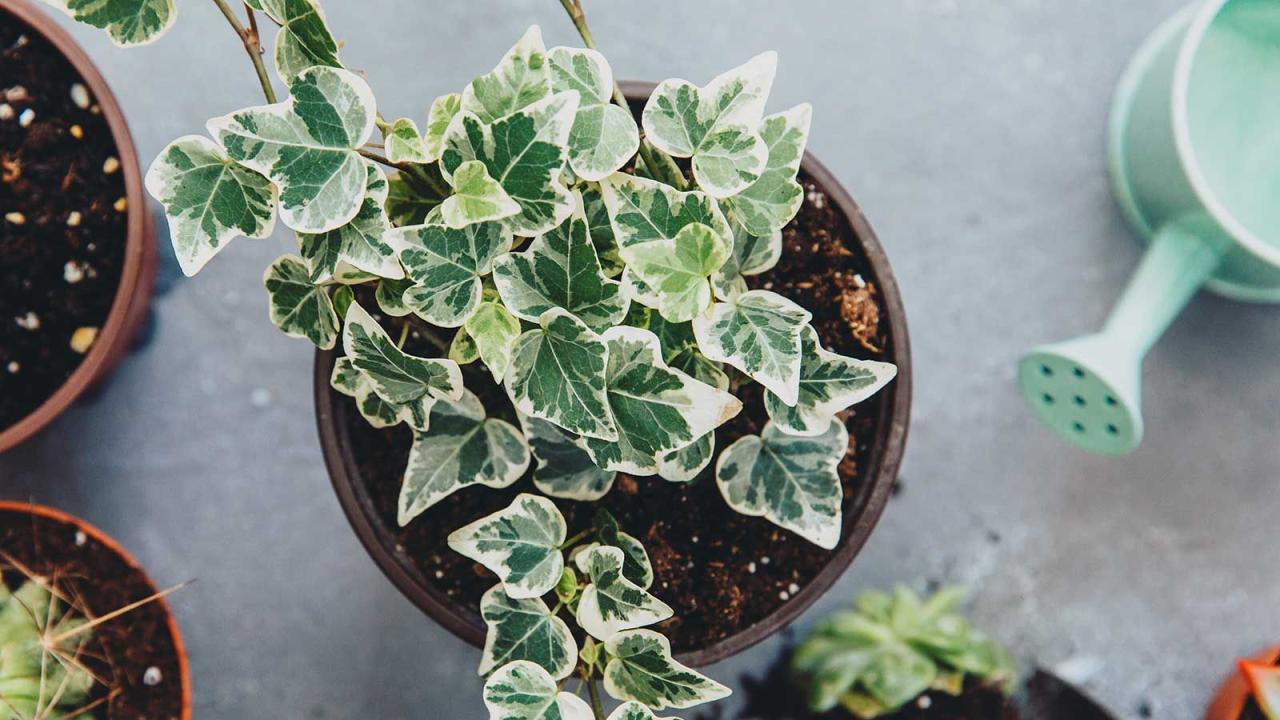
- English Ivy (Hedera helix):This evergreen climber is a popular choice for covering walls and ground.
- Boston Ivy (Parthenocissus tricuspidata):This deciduous climber is known for its vibrant fall foliage.
- Algerian Ivy (Hedera canariensis):This fast-growing ivy features large, glossy leaves and is often used for ground cover.
- Irish Ivy (Hedera hibernica):This vigorous climber is known for its dark green leaves and tolerance to shade.
Process of Ivy Propagation
Ivy propagation through cuttings involves taking a section of a healthy stem and encouraging it to develop roots. The process typically involves these steps:
- Select a Healthy Stem:Choose a non-flowering stem from a healthy ivy plant.
- Cut the Stem:Use sharp pruning shears to cut a 4-6 inch section of the stem, ensuring each cutting has at least two nodes (leaf joints).
- Remove Lower Leaves:Strip off the leaves from the bottom inch or two of the cutting.
- Dip in Rooting Hormone (Optional):Apply rooting hormone powder to the cut end of the stem to encourage root development.
- Pot the Cuttings:Plant the cuttings in a pot filled with a well-draining potting mix, ensuring the nodes are buried beneath the soil.
- Water and Maintain Humidity:Water the cuttings regularly, keeping the soil moist but not waterlogged. You can also use a clear plastic bag or a humidity dome to create a humid environment around the cuttings.
- Provide Light:Place the pot in a bright location, but avoid direct sunlight.
- Wait for Roots to Develop:It typically takes several weeks for ivy cuttings to develop roots. Once the roots are established, you can transplant the new plants into their permanent locations.
Selecting and Preparing Ivy Cuttings
The quality of your ivy cuttings directly influences their success in rooting. Choosing healthy and vigorous stems will significantly increase your chances of propagation.
Here’s a guide to selecting and preparing ivy cuttings for successful propagation:
Choosing Healthy Ivy Stems
Selecting healthy ivy stems is crucial for successful propagation. Here are some key characteristics to look for:
- Look for stems that are actively growing.This indicates the plant is healthy and has the energy to produce roots. These stems will usually have a vibrant green color and may have new leaves developing.
- Avoid stems with signs of disease or damage.Look for stems that are free from spots, discoloration, or any signs of insect infestation. Damaged stems may be more prone to rot and are less likely to root successfully.
- Choose stems that are not too woody.Newly grown stems are typically more pliable and have a higher success rate in rooting.
Ideal Length and Thickness for Ivy Cuttings
The length and thickness of your ivy cuttings are important factors for successful propagation.
- The ideal length for ivy cuttings is 4-6 inches.This provides enough surface area for root development while minimizing the amount of energy required for the cutting to establish itself.
- Choose stems that are about the thickness of a pencil.These stems are typically strong enough to support root growth but not so thick that they are difficult to root.
Making Clean Cuts at the Base of the Cuttings
Making clean cuts at the base of your ivy cuttings is essential for proper root development.
- Use a sharp knife or pruning shears to make a clean, angled cut at the base of the cutting.This helps to increase the surface area for root growth and allows for easier penetration of the rooting medium.
- Cut just below a node.Nodes are the points on the stem where leaves or roots grow. Cutting below a node will encourage root development at that point.
Methods for Propagating Ivy Cuttings
Once you have your ivy cuttings ready, you can choose from several propagation methods to grow new plants. Each method has its advantages and disadvantages, so consider your resources and desired timeline when making your selection.
Expanding your garden with ivy is a breeze using propagation techniques. One of the simplest methods is using cuttings, which are essentially pieces of the ivy plant that are encouraged to grow roots. To master this process, it’s helpful to understand the fundamentals of ivy propagation.
For a comprehensive guide on how to turn a single ivy plant into a multitude, check out this detailed resource: How to Turn One Ivy Plant into Many: The Ultimate Propagation Guide. With this knowledge, you’ll be able to effortlessly multiply your ivy plants and enjoy their vibrant foliage throughout your garden.
Methods for Propagating Ivy Cuttings
The following table Artikels three common methods for propagating ivy cuttings:
Method |
Description |
Pros |
Cons |
|---|---|---|---|
Water Propagation |
Water propagation involves placing ivy cuttings in a container filled with water. The cuttings should be submerged in water up to the first set of leaves. Change the water every few days to prevent bacterial growth and ensure the cuttings receive fresh oxygen. Once roots have developed, typically within a few weeks, you can transfer the cuttings to soil. |
Easy, inexpensive, allows for observation of root development. |
Slower rooting time, cuttings may be more susceptible to rot. |
Soil Propagation |
Soil propagation involves planting ivy cuttings directly in a pot filled with a well-draining potting mix. Insert the cuttings into the soil at an angle, leaving the top few leaves exposed. Water the cuttings thoroughly and keep the soil moist but not waterlogged. Roots will develop within a few weeks, and the cuttings can be transplanted to their permanent location once they have established. |
Faster rooting time, cuttings establish stronger roots. |
Requires more effort and resources. |
Air Layering |
Air layering is a method of rooting a cutting without removing it from the parent plant. This method involves making a small incision on the stem, then wrapping the wound with damp moss or rooting hormone. The moss is then covered with plastic wrap to create a humid environment. Once roots have developed, typically within a few months, the cutting can be separated from the parent plant. |
Highly successful, produces mature plants quickly. |
More time-consuming and requires specialized materials. |
Caring for Ivy Cuttings
Providing the right conditions for your ivy cuttings is crucial for successful rooting. This section will guide you on creating the ideal environment for your cuttings to thrive and develop strong roots.
Environmental Conditions for Rooting
The environment plays a significant role in the rooting process of ivy cuttings. The ideal conditions include:
- Temperature:Ivy cuttings root best in warm temperatures, typically between 65°F and 75°F (18°C and 24°C).
- Humidity:High humidity is essential for preventing the cuttings from drying out. You can achieve this by using a humidity dome or misting the cuttings regularly.
- Light:Ivy cuttings need bright, indirect light. Avoid direct sunlight, which can scorch the leaves.
Watering and Fertilizing
- Watering:Keep the rooting medium consistently moist but not soggy. Overwatering can lead to root rot. Check the moisture level by gently touching the soil; if it feels dry, water thoroughly.
- Fertilizing:Avoid fertilizing the cuttings during the rooting process. The focus should be on root development, not on top growth. Once the cuttings have rooted and are actively growing, you can start fertilizing with a balanced liquid fertilizer diluted to half strength.
Protecting Ivy Cuttings from Pests and Diseases
Ivy cuttings are susceptible to pests and diseases, especially in humid environments. Here are some tips for prevention:
- Pest Control:Regularly inspect the cuttings for signs of pests like aphids, mealybugs, or spider mites. If you find any pests, treat them with an insecticidal soap or neem oil.
- Disease Prevention:Maintain good hygiene by using clean tools and sterile potting mix. Avoid overwatering, which can lead to fungal diseases. If you notice any signs of disease, remove the affected cuttings and treat the remaining ones with a fungicide.
Transplanting Ivy Cuttings
Once your ivy cuttings have developed strong roots, they are ready to be transplanted into their permanent location. This process should be done with care to minimize stress on the young plants and ensure their successful establishment.
Similar to propagating ivy, you can also multiply your rose collection by taking cuttings. If you’re interested in learning more about this technique, check out The Essential Guide to Rose Propagation: How To Grow Stunning Roses from Cuttings , which provides a detailed breakdown of the process.
Once you’ve mastered rose propagation, you’ll be well on your way to expanding your garden with beautiful, fragrant blooms.
Recognizing When Ivy Cuttings Are Ready for Transplanting
The best time to transplant ivy cuttings is when they have developed a healthy root system. This can typically be determined by:
- New growth:Observe the cuttings for new, vigorous growth, indicating that the roots are providing adequate nutrients and water.
- Firmness:Gently tug on the cutting. If it offers resistance, it suggests that the roots have anchored themselves well.
- Root visibility:If you are using a clear container, you might be able to see the roots growing through the drainage holes.
It’s important to note that the time it takes for ivy cuttings to develop roots can vary depending on the variety of ivy, the environmental conditions, and the propagation method used.
Transplanting Ivy Cuttings
Transplanting ivy cuttings requires a gentle approach to minimize damage to their delicate root systems. Follow these steps:
- Prepare the planting site:Choose a location that receives adequate sunlight or shade, depending on the ivy variety. Prepare the soil by loosening it and incorporating organic matter to improve drainage and nutrient content.
- Dig a hole:Dig a hole that is slightly larger than the root ball of the cutting. The hole should be deep enough to accommodate the roots without bending them.
- Gently remove the cutting:Carefully remove the cutting from its container, ensuring the root ball remains intact. If the roots are circling around the container, gently loosen them to encourage outward growth.
- Place the cutting in the hole:Position the cutting in the hole, ensuring the crown (where the roots meet the stem) is level with the soil surface.
- Backfill the hole:Gradually fill the hole with soil, gently pressing it around the roots to eliminate air pockets. Avoid compacting the soil too tightly, as it can restrict root growth.
- Water thoroughly:Water the newly transplanted ivy cuttings deeply to settle the soil and provide moisture for root establishment.
Caring for Newly Transplanted Ivy Cuttings
Newly transplanted ivy cuttings require extra care to ensure their survival and growth. Follow these tips:
- Water regularly:Keep the soil consistently moist, especially during the first few weeks after transplanting. The frequency of watering will depend on the climate and soil type.
- Provide shade:If the ivy cuttings are planted in a sunny location, provide some shade during the hottest part of the day to prevent them from drying out.
- Fertilize:Apply a balanced fertilizer a few weeks after transplanting to provide the cuttings with essential nutrients. Avoid over-fertilizing, as it can damage the roots.
- Monitor for pests and diseases:Keep an eye out for any signs of pests or diseases and take appropriate measures to control them.
Troubleshooting Common Ivy Propagation Issues
While propagating ivy is generally a straightforward process, occasional problems can arise. Understanding common issues and their causes can help you identify and address them effectively, increasing your success rate.
Identifying and Addressing Common Problems
Several factors can contribute to difficulties in propagating ivy. Here’s a breakdown of common problems and their solutions:
Lack of Root Development
- Cause:Insufficient water, poor drainage, or overly dense growing medium can hinder root development.
- Solution:Ensure the growing medium is consistently moist but not waterlogged. Use a well-draining potting mix and avoid overwatering. Regularly check the moisture level and adjust watering accordingly. Consider using a rooting hormone to encourage root growth.
Fungal Diseases
- Cause:Excessive moisture, poor air circulation, or contaminated growing medium can lead to fungal diseases like root rot.
- Solution:Use sterilized growing medium and ensure adequate ventilation. Avoid overwatering and allow the soil to dry slightly between waterings. If fungal growth is detected, treat with a fungicide.
Wilting or Yellowing Leaves
- Cause:Overwatering, underwatering, or nutrient deficiencies can cause wilting or yellowing leaves.
- Solution:Adjust watering frequency based on the moisture level of the growing medium. Use a balanced fertilizer to provide essential nutrients. Ensure proper drainage to prevent waterlogging.
Slow Growth or Stunted Development
- Cause:Inadequate light, insufficient nutrients, or pest infestations can hinder growth.
- Solution:Provide adequate light, ideally bright indirect light. Use a balanced fertilizer to supply necessary nutrients. Inspect regularly for pests and treat accordingly.
Stem Rot
- Cause:Overwatering or poor drainage can lead to stem rot.
- Solution:Allow the soil to dry slightly between waterings. Ensure adequate drainage and use a well-draining potting mix.
Creative Uses for Ivy Cuttings
Ivy’s versatility makes it a valuable asset for landscaping and gardening. Its adaptability allows for various applications, from cascading ground cover to striking vertical displays. With a few cuttings, you can transform your garden into a lush and vibrant oasis.
Using Ivy Cuttings to Create Hanging Baskets
Hanging baskets provide a beautiful way to showcase ivy’s trailing growth habit. Their cascading foliage adds a touch of elegance and softens harsh lines in outdoor spaces.
- Select a well-draining pot:Choose a hanging basket with drainage holes to prevent waterlogging.
- Fill the basket with a potting mix:Use a high-quality potting mix designed for hanging baskets, ensuring proper drainage and aeration.
- Plant the ivy cuttings:Space the cuttings evenly throughout the basket, allowing ample room for growth.
- Water regularly:Keep the potting mix consistently moist, but avoid overwatering.
- Fertilize periodically:Use a balanced liquid fertilizer to encourage healthy growth.
Using Ivy Cuttings to Create Ground Cover
Ivy’s dense foliage and fast growth make it an ideal ground cover, suppressing weeds and creating a lush carpet.
- Prepare the soil:Remove existing weeds and loosen the soil to promote root development.
- Space the cuttings appropriately:Plant the cuttings 12-18 inches apart to allow for adequate spacing.
- Water regularly:Keep the soil consistently moist, especially during the first few weeks after planting.
- Mulch the area:Apply a layer of mulch to help retain moisture and suppress weeds.
Using Ivy Cuttings to Create Vertical Gardens
Vertical gardens offer a unique and space-saving way to incorporate ivy into your garden. Their cascading foliage creates a stunning visual impact, adding greenery to walls and fences.
- Choose a suitable wall or fence:Select a sturdy surface that can support the weight of the ivy.
- Install a vertical garden system:Utilize a pre-made vertical garden system or create your own using wire mesh or other materials.
- Plant the ivy cuttings:Secure the cuttings to the vertical garden system, ensuring they have adequate space to grow.
- Water regularly:Provide consistent moisture, especially during dry periods.
Incorporating Ivy into Unique Garden Designs
Ivy’s versatility allows for creative and imaginative garden designs.
- Create a living wall:Train ivy to grow over a wall or fence, creating a natural and vibrant living wall.
- Form a cascading waterfall effect:Plant ivy on a raised platform or wall, allowing it to cascade downwards, mimicking a waterfall.
- Design a whimsical topiary:Use ivy to create whimsical shapes and forms, adding a touch of whimsy to your garden.
- Create a woodland-inspired haven:Incorporate ivy into your garden to create a woodland-inspired atmosphere, with its lush foliage and cascading growth.
Final Review

By following these steps, you can unlock the potential of ivy cuttings and create a stunning tapestry of greenery in your garden. With patience and a touch of green thumb magic, you’ll be amazed at the ease with which you can transform these humble cuttings into a thriving, verdant oasis.
So, grab your gardening gloves, choose your favorite ivy variety, and embark on a rewarding journey of propagation. Your garden will thank you for it!
Popular Questions: How To Use Ivy Cuttings To Expand Your Garden – Propagation Tips
Can I use any type of ivy for propagation?
While many ivy varieties can be propagated, some are more suitable than others. English ivy and Boston ivy are popular choices for their hardiness and adaptability.
What is the best time of year to propagate ivy?
Spring and early summer are ideal times for propagating ivy cuttings, as the weather is warm and conducive to growth.
How long does it take for ivy cuttings to root?
Rooting time varies depending on the method used and environmental conditions. Water propagation typically takes longer than soil propagation, with roots appearing in a few weeks to a few months.
What should I do if my ivy cuttings are wilting?
Wilting can indicate insufficient water or excessive heat. Increase watering frequency and provide shade if needed.
Can I propagate ivy cuttings in winter?
While it’s possible to propagate ivy in winter, success rates may be lower due to colder temperatures and reduced light.
